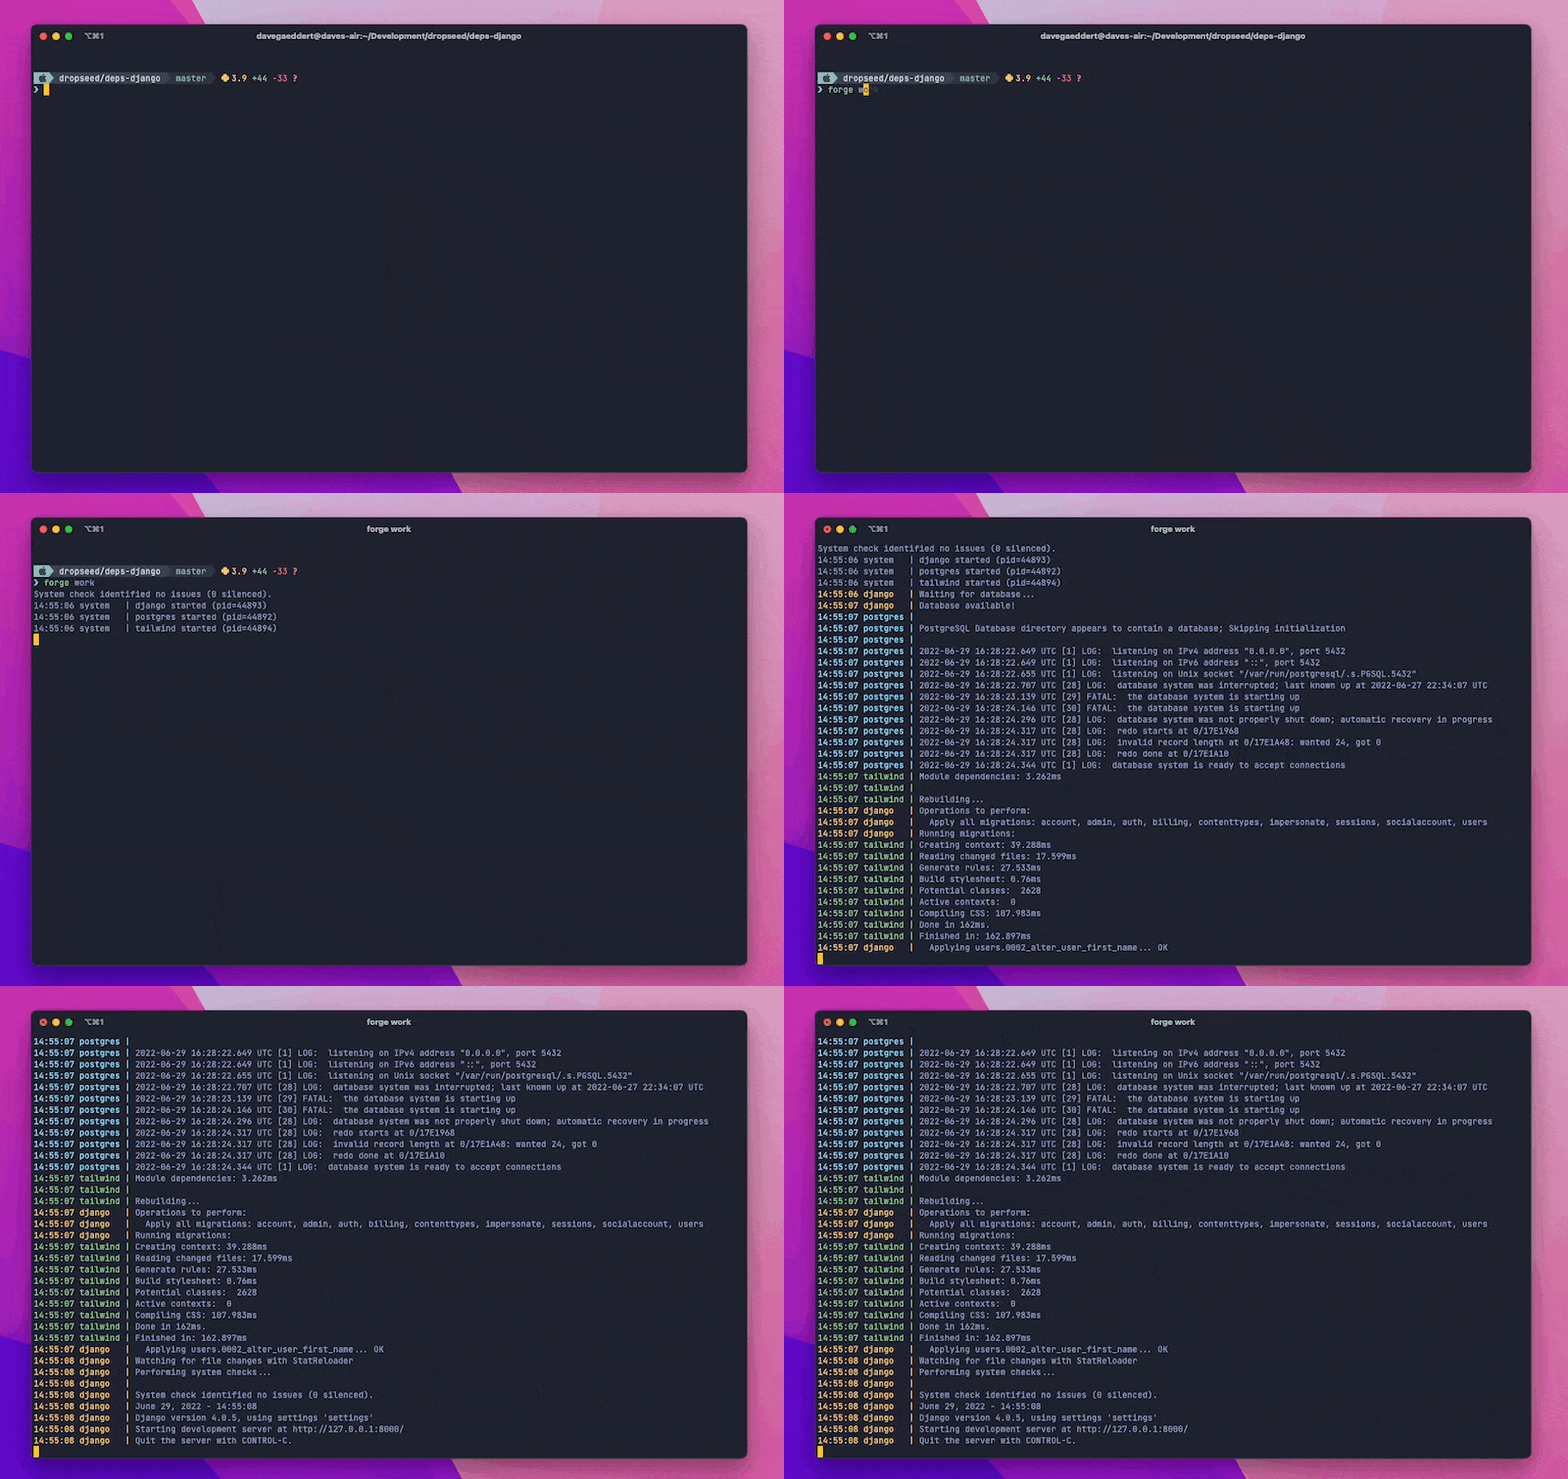
# forge-work
A single command to run everything you need for local Django development.

The following processes will run simultaneously (some will only run if they are detected as available):
- [`manage.py runserver` (and migrations)](#runserver)
- [`forge-db start --logs`](#forge-db)
- [`forge-tailwind compile --watch`](#forge-tailwind)
- [`npm run watch`](#package-json)
- [`stripe listen --forward-to`](#stripe)
- [`ngrok http --subdomain`](#ngrok)
- [`celery worker`](#celery)
It also comes with [debugging](#debugging) tools to make local debugging easier with VS Code.
## Installation
First, install `forge-work` from [PyPI](https://pypi.org/project/forge-work/):
```sh
pip install forge-work
```
Now instead of using the basic `manage.py runserver` (and a bunch of commands before and during that process), you can simply do:
```sh
forge work
```
## Development processes
### Runserver
The key process here is still `manage.py runserver`.
But, before that runs, it will also wait for the database to be available and run `manage.py migrate`.
### forge-db
If [`forge-db`](https://github.com/forgepackages/forge-db) is installed, it will automatically start and show the logs of the running database container.
### forge-tailwind
If [`forge-tailwind`](https://github.com/forgepackages/forge-tailwind) is installed, it will automatically run the Tailwind `compile --watch` process.
### package.json
If a `package.json` file is found and contains a `watch` script,
it will automatically run.
This is an easy place to run your own custom JavaScript watch process.
### Stripe
If a `STRIPE_WEBHOOK_PATH` env variable is set then this will add a `STRIPE_WEBHOOK_SECRET` to `.env` (using `stripe listen --print-secret`) and it will then run `stripe listen --forward-to <runserver:port/stripe-webhook-path>`.
### Ngrok
If an `NGROK_SUBDOMAIN` env variable is set then this will run `ngrok http <runserver_port> --subdomain <subdomain>`.
Note that [ngrok](https://ngrok.com/download) will need to be installed on your system already (however you prefer to do that).
### Celery
If a `CELERY_APP` env variable is set, then an autoreloading celery worker will be started automatically.
## Debugging
[View on YouTube →](https://www.youtube.com/watch?v=pG0KaJSVyBw)
Since `forge work` runs multiple processes at once, the regular [pdb](https://docs.python.org/3/library/pdb.html) debuggers can be hard to use.
Instead, we include [microsoft/debugpy](https://github.com/microsoft/debugpy) and an `attach` function to make it even easier to use VS Code's debugger.
First, import and run the `debug.attach()` function:
```python
class HomeView(TemplateView):
template_name = "home.html"
def get_context_data(self, **kwargs):
context = super().get_context_data(**kwargs)
# Make sure the debugger is attached (will need to be if runserver reloads)
from forgework import debug; debug.attach()
# Add a breakpoint (or use the gutter in VSCode to add one)
breakpoint()
return context
```
When you load the page, you'll see "Waiting for debugger to attach...".
Add a new VS Code debug configuration (using localhost and port 5768) by saving this to `.vscode/launch.json` or using the GUI:
```json
// .vscode/launch.json
{
// Use IntelliSense to learn about possible attributes.
// Hover to view descriptions of existing attributes.
// For more information, visit: https://go.microsoft.com/fwlink/?linkid=830387
"version": "0.2.0",
"configurations": [
{
"name": "Forge: Attach to Django",
"type": "python",
"request": "attach",
"connect": {
"host": "localhost",
"port": 5678
},
"pathMappings": [
{
"localRoot": "${workspaceFolder}",
"remoteRoot": "."
}
],
"justMyCode": true,
"django": true
}
]
}
```
Then in the "Run and Debug" tab, you can click the green arrow next to "Forge: Attach to Django" to start the debugger.
In your terminal is should tell you it was attached, and when you hit a breakpoint you'll see the debugger information in VS Code.
If Django's runserver reloads, you'll be prompted to reattach by clicking the green arrow again.


